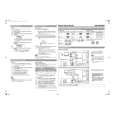
Setting the Clock
4Press the TUNING/TIME ( or ) button to adjust the hour and then
press the MEMORY/SET button.
z Press the TUNING/TIME ( or ) button once to advance the time by 1 hour.
Hold it down to advance continuously.
z When the 12-hour display is selected, "AM" will change automatically to "PM".
5Press the TUNING/TIME ( or ) button to adjust the minutes and
then press the MEMORY/SET button.
In this example, the clock is set for the 24-hour (0:00) display.
1Press the ON/STAND-BY button to turn the power on.
zPress the TUNING/TIME ( or ) button once to advance the time by 1
2Press the CLOCK button and within 5 seconds, press the MEMO-
minute. Hold it down to change the time in 5-minute intervals.
RY/SET button.
z The hour will not advance even if minutes advance from "59" to "00".
z The clock begins counting from "0" seconds. (Seconds are not displayed.)
The time display will disappear after a few seconds.
- Setting the Clock -To confirm the time display:
Press the CLOCK button.
Basic Operation3Press the TUNING/TIME ( or ) button to select 24-houTrh ore ti 12-me display will appear for about 5 seconds.
hour display and then press the MEMORY/SET button.
Note:
The "CLOCK" or time will flash at the push of the CLOCK button when the AC power
supply is restored after a power failure or unplugging the unit.
Readjust the clock as follows.
"0:00"The 24-hour display will appear.
(0:00 - 23:59)To readjust the clock:
Perform "Setting the Clock" from the beginning. If the time display is flashing, step 3
"AM 12:00"The 12-hour display will appear.
(for selecting the 24-hour or 12-hour display) will be skipped.
(AM 12:00 - PM 11:59)
"AM 0:00"The 12-hour display will appear.To change the 24-hour or 12-hour display:
(AM 0:00 - PM 11:59)1 Clear all the programmed contents. [Refer to "Clearing all the memory (reset)" on
page 31 for details.]
Note that this can only be set when the unit is first installed or it has been reset.
2 Perform "Setting the Clock" from the beginning.
[Refer to "Clearing all the memory (reset)" on page 31 for details.]
E-13ENGLISH
01/3/8CD-BK250W(X)E2.fm |

 ACEC
ACEC SHARP
SHARP