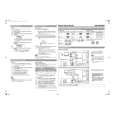
Rear panel description
Depending on the impedance of the speakers used, set theAUDIO IN/OUT
SPEAKER IMPEDANCE SELECTOR on the rear panel asThere are 6 audio inputs and 3 audio outputs for use with ana-
shown in the table.log signals. The audio inputs and outputs require RCA type
connectors.
Usable speaker impedanceSelector positionY When connecting a VCR or other video component, make
sure you connect the audio and video leads together (i.e.,
A or B speaker
both to VIDEO).
4 ohms or higher/speaker
Y The PHONO jacks are designed for use with turntables that
use moving magnet cartridges.A and B speakers
8 ohms or higher/speaker
MONITOR OUT
This output enables you to connect to a television monitor.
A or B speaker
8 ohms or higher/speakerSUB WOOFER PRE OUT
This terminal enables you to connect to an active subwoofer.
Note: The subwoofer can only operate when speaker system
AC INLETA is turned on.
Plug the supplied power cord into this AC INLET and then
REMOTE CONTROL
into the power outlet on the wall.
The terminal on the DTM-5.3 enables you to connect to
Y Do not use a power cord other than the one supplied with the
other Integra/Onkyo components equipped with the same
DTM-5.3. The power cord supplied is designed for use with
terminal. When a component is -connected, you can point
the DTM-5.3 and should not be used with any other device.
the remote controller supplied with the DTM-5.3 at the sensor
YNever disconnect the power cord from the DTM-5.3 while
on the DTM-5.3 and operate that component without having
the other end is plugged into a wall outlet. Doing so may
to switch remote controllers.
cause an electric shock. Always connect by plugging into
In addition, by connecting components to the terminal,
the wall outlet last and disconnect by unplugging from theyou can also perform the system operations given below.
wall outlet Ţrst.
Power on/ready function
When the DTM-5.3 is in Standby mode, if an -connected
AC INLET
component is turned on, then the DTM-5.3 also turns on and
the input source selected at the DTM-5.3 automatically
switches to that component.
Power cord If the power cord for an -connected component is con-
(supplied)nected to the AC OUTLET on the DTM-5.3, or if the DTM-
5.3 is turned on, this function will not work.
To an AC wall outletDirect change function
When the play button is pressed on an -connected compo-
nent, the input source selected at the DTM-5.3 automatically
changes to that component.
AC OUTLET
Power off function
The DTM-5.3 is supplied with AC mains outlet for connect-
When the DTM-5.3 is placed in Standby mode, all -con-
ing the power cords from other devices so that their power is
nected components are also automatically placed in Standby
supplied through the DTM-5.3. By doing this, you can use themode.
Standby/On button on the DTM-5.3 to turn on and off the
connected devices as well.
DTM-5.3
REMOTE CONTROL
Caution:
Make sure that the capacity of the other components con-
nected to this unit does not exceed the 120 watts.
connector
AC INLET
Ex: Integra/Onkyo CD player
AC OUTLET connector
AC 120 120 V 60 W 1 Hz SWITCHED A MAX.
Ex: Onkyo cassette tape deck
To connect components using the terminal, simply con-
Other componentnect a remote control cable from this terminal to the
terminal of the other component. An remote control
cable with a 1/8-inch (3.5mm) miniature two-conductor plug
SPEAKERS terminals
comes with every cassette tape deck, compact disc player,
Connect the left and right speakers here.
MD recorder, and DVD player that has an terminal.
Y When performing operations with -connected components
VIDEO IN/OUT
using the system, do not use the remote zone (Zone 2).
The DTM-5.3 provides two video inputs and one video out-
YFor remote control operation, the audio connection cables
put. Connect a DVD player, VCR, or other video player to the
must also be connected.
input and connect a VCR or other video recorder to the output.
Y If a component has two terminals, you can use either
one to connect to the DTM-5.3. The other one can be used
to daisy chain to another component.
9 |

 ACEC
ACEC INTEGRA