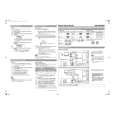
3Start recording while checking the subject on the LCD screen.
The date and time is not set up in the default setting. To set the date and time, see page 17.
aRemove the lens cap.
Lens cap is not attached
when you purchase your Quick Start Guide
camcorder (p. 104).
bPress OPEN and open
the LCD panel.
cWhile pressing the
green button, slide the
POWER switch down
to light up the
CAMERA lamp.
The power turns on.
START/STOP
dPress REC START/STOP.
Recording starts. To change
to standby mode, press REC
START/STOP again.
You can also use REC START/
STOP of the LCD panel.
4View the recorded picture on the LCD screen.
aSlide the POWER
switch repeatedly
until the PLAY/EDIT
lamp lights up.
bPress (rewind).
cPress (play) to
start the playback.
To stop, press .
To turn off the power, slide the
POWER switch up to (CHG)
OFF.
Quick Start Guide9 |

 ACEC
ACEC