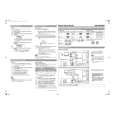
oscilloscopeAbout RV402 on the MAIN board
BD boardRV402 of the MAIN board requires no adjustments. Please note
that it should be dixed to mechanical center position when you
TP (TE)moved and do not know origin position.
TP (VC)
Adjustment Location :
When a general remote commander is not used:
1. Solder lead wires to TP (DVDD) and TP (TOFF) on the BD[ BD BOARD ] N CONDUCTOR SIDE N
board severally.
2. Connect the oscilloscope to TP (TE) of the BD board.CN102
3. Press the POWER button to turn ON the power.
4. Open the front cover, and press the CD PLUS ONE button.
5. Set the disc (YEDS-18) into the OPLUS ONE� slit.
6. Close the front cover, and chuck the disc.
7. Playback the fifth track of the disc.
8. Short-circuit the lead wire connected at step 1. (The tracking
servo is turned OFF)IC102
TP
9. Check the level B of the oscilliscope's waveform and the ACN103
(PLCK)
(DC voltage) of the center of the Traverse waveform.
Confirm the following :TPCN101
TP
A/B x 100 = less than ? 10%(DVDD)
TP(TOFF)
(RF)
Traverse waveform
Center of the waveformTP
(FE)
IC101
B
TP
(VC)
A (DC voltage)
0VTP
(TE)
level : 0.7 ? 0.3 Vp-p
10. Disconnect the lead wire short-circuited at step 8. (The tracking
[ MAIN BOARD ] N COMPONENT SIDE N
servo is turned ON.) Confirm the C (DC voltage) is almost equal
to the A (DC voltage) is step 8.
CN301 CN302
Traverse waveformRV301
IC301
RV351
C (DC
voltage)
0V
CN107 CN106
Tracking servoTracking servo
OFFON
11. Turn OFF the power, and remove the lead wire connected at
step 1.
RF PLL Free-run Frequency Check
Procedure :
1. Connect the frequency counter to TP (PLCK) of the BD board.
frequency counter
BD board
TP (PLCK)
2. Press the POWER button to turn ON the power.
3. Open the front cover, and press the CD PLUS ONE button.
4. Set the disc (YEDS-18) into the OPLUS ONE� slit.
5. Close the front cover, and chuck the disc.
6. Playback the fifth track of the disc.
7. Confirm that reading on frequency counter is 4.3218 MHz ?
30 kHz.
N 25 N |

 ACEC
ACEC