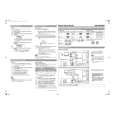
CONVERGENCE ADJUSTMENT
Adjust convergence from center to circumference in order.
1. Select the adjustment mode following the steps on page 9 of original
service manual.
RCUT
40H
KEY FUNCTION IN THE
CONVERGENCE ADJUSTMENT:
Up :2 button
Selet Green color:3 button
Left :4 button
Blinking of cursor ON/OFF: 5 button 2. Press O7� button to display the built-in cross-hatch pattern.
Right:6 button
Adjust mode ON/OFF:7 button21.5 (43")
26.5 (50")
Down:8 button
28.5 (55")
Erase Green line:0 button
31.0 (61")
Erase Red line:100 button
Cursor
Erase Blue line:CHRTN (ENT) button
P = 43.7 x14 (43")
50.5 x14 (50")
55.8 x14 (55")
62 x14 (61")
21.5 (43")
26.5 (50")
3.5 (43", 50")P = 72.2 x12 (43") 3.5 (43", 50")28.5 (55")
4.0 (55")84 x12 (50") 4.0 (55")31.0 (61")
5.0 (61")92.5 x12 (55")5.0 (61")
102.5 x12 (61")
Note:The pattern includes three colors (R, G, B).
Adjusting procedure in replacing conver-The cursor should be blinking in Red.
gence board.This means that the Red color is adjustable.
1. User convergence center check. Make Adjustment around cursor can be done.
sure the best convergence setting is3. Press O3� button to select Green color to be adjusted.
about the center of adjustable range4..Press O5� button to stop the blinking of cursor.
2. CENTERING ADJUSTMENT5. Press O2 (up)�, O8 (down)�, O4 (left)� or O6 (right)� to obtain the correct
3. PICTURE POSITION ADJUSTMENTcross-hatch pattern as above.
4. HIT, WID ADJUSTMENTIf necessary, the specified color line can be erased from the screen.
5. CONVERGENCE ADJUSTMENT100 button .................. to erase Red line
0 button .................. to erase Green line
RTN (ENT) button .................. to erase Blue line
6. Press O5� button to make the cursor blinking.
7. Press O2�, O8�, O4�, O6� buttons to move the cursor to other point to be
adjusted.
8. Repeat steps 4 to 7.
9. Repeat steps 3 to 8 to adjust Red and Blue colors.
Converge the selected color line into the Green line.
10. Press O7� button to enter the adjusted states.
At this time, picture changes for about 1 second.
11. Press O7� button again to return to the normal picture.
� 3 � |

 ACEC
ACEC