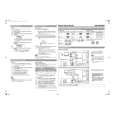
I Important: High Voltage adjustment and
.
A Horizontal Drive Frequency
(1) Input HD (10801 fH=33.75kHz) signal to INPUT
adjustment should NOT be adjusted 2 component terminal. (Use Signal Generator or
in field. These are adjusted at factory Set-Top-Box).
using precise loads and should NOT
(2) Short between PDD 1 connector 7pin & PDDI 3,
be readjusted.
4, 6 or tOpin (GND).
(3) Go to l*C ADJ. mode by holding INPUT key on
1.4 High Voltage Adjustment (should NOT be
front panel, then pressing POWER button.
readjusted in field).
(4) Choose [H. F. V] item of l*C ADJ items.
(5) Adjust HOR. DRIVE frequency to following spec.
Adiustment preparation
by changing value of [H. F. v]. (This should never
(1) Connect High Voltage meter between FBT High
need adjustment).
Voltage output. Connect GND of High Voltage meter
to CPT GND or FBT GND.
ADJ. SPEC. = 33.75kHz +/-0.25kHz.
(2) Check that High Voltage adjustment VR (RH44) is
counter-clockwise fully (located behind FBT on DEFLECTION PWB.
DEFLECTION PWB).
(3) Receive color bar signal.
(4) VIDEO control should be reset. VER OUT HEATSINK
[PDDSI
Adjustment procedu e
(1) Adjust High Vol&ge to following spec. by turning VR
0
RH44 clockwise slowly. (This should never need 10
adjustment).
ADJ. SPEC = 31.5kV +/-0.5kV 1 0
(2) After adjustment, fix VR RH44 by Silicone glue [PDDlI
(KE40RTV).
2. FINAL ASSEMBLY ADJUSTMENT
2.1 Cut Off Adjustment
CONV.
HEATSINK. Adiustment preparation
(1) Set R and G drive VR?s on CPT P.W.B. to center.
(2) Adjust screen VR?s on Focus Pack fully
counterclockwise.
(3) Adjust Focus VR?s on Focus Pack fully
High Voltage Adjustment VR.
clockwise.
.(4) Set video conditions to factory reset.
M
(5) The vertical incident illumination on the screen
DEFLECTION PWB. should be 20 lux or less (room should be dark).
1.5 Horizontal Drive Frequency Adjustment Adiustment procedure
(should NOT be readjusted (1) Press INPUT key on control panel and then
in field). POWER ON to access l*C adjustment mode.
(2) Choose ?SERVICE? item from 1% adjustment
Adjustment preparation menu by pressing cursor ,.
(1) Connect frequency counter to PDDI connector (3) Screen VR should be turned clockwise gradually
7pin & PDDI 3,4, 6 or IOpin (GND). and set so that retrace fine begins to appear.
(2) VIDEO control should be reset. (4) Return to ?NORMAC mode by cursor ) again.
(5) Adjust Focus VR?s so that focus is even all
Adiustment procedure around screen.
pTsmiiq
2.2 DCU Cross Hatch Phase Setting
(1) Receive NTSC color bar signal.
(2) Short between PDD 1 connector 7pin & PDDI 3,
Adjustment preparation
4, 6 or IOpin (GND).
(1) Cut off adjustment should finished.
(3) Go to 1% ADJ. mode by holding INPUT key on
(2) Set video conditions to factory reset.
front panel, then pressing POWER button.
(4) Choose [H. F. V.] item of 1% ADJ items.
Adjustment procedure
(5) Adjust HOR. DRIVE frequency to follwing spec.
by changing value of [H. F. V.] (This should never JPROGRESSIVE MODEI
need adjustment).
(1) Receive any NTSC signal.
ADJ. SPEC. = 31.5kHz +/-0.25kHz.
(2) Push ?SERVICE ONLY? SW on DEFLECTION
PWB. (Going to DCU ADJ. mode).
11 |

 ACEC
ACEC